
How to Convert a Script Into Coherent Visual Sections Using AI Storyboard in CapCut Desktop Video Editor


It may be difficult to make a written script into clear parts of the video. One can hardly tell where one scene starts, and the other one begins. In CapCut Desktop Video Editor, this can be done with the help of AI Storyboard.
The tool separates scripts into visual components and proposes the appearance of each scene. This assists in maintaining the order of videos and making them readable. The division of scripts into scenes is also made to make the video more interesting and comprehensible.
You can write or edit your script with AI Writer prior to doing so. It also saves time and has a clear structure of your script that you can use on the storyboard.
The Need of AI Storyboards in Script-to-Video Conversion
It takes less time to use AI Storyboard in the CapCut Desktop Video Editor. Ordinarily, it takes hours to divide a script into scenes, and errors are prone to occur. The AI reads your script and marks the point of starting and finishing each scene. It also implies imagery to every segment.
This serves to maintain the continuity of the video. The device ensures that style and timing are maintained throughout the video. You are able to make adjustments in case something does not feel right, yet the AI provides a solid starting point. Note, CapCut PC is not entirely free.
There are certain paid AI Storyboard features. The software is also compatible with other video formats and screen sizes. You can create YouTube, social media, or other platform videos on it. In general, it simplifies and shortens the script-to-video process and increases its reliability.
Major CapCut Desktop AI Storyboard Characteristics
The AI Storyboard of CapCut Desktop Video Editor is full of useful functions. Firstly, it is capable of converting your script to visuals in scenes automatically. You are not required to segment the script by yourself.
You will be able to choose various types of video, such as cinematic, 3D, cartoon, or fun themes, to make every scene appear correct. It is also possible to shorten or lengthen the length of each scene according to your script.
This AI can easily inject voiceovers into your script, and then your voice will fit like a glove. You can also customize images and timings to have a greater level of control. It is also possible to add music, sound effects, or stickers to every scene and make it more interesting.
These are all options that are convenient to locate in the workspace. Visit the official AI Storyboard page to learn more about each feature and provide examples. This will assist you in realizing how to make your storyboard appear professional without taking hours to make edits.
Guide to Turning a Script into an AI Storyboard of Coherent Visual Bits
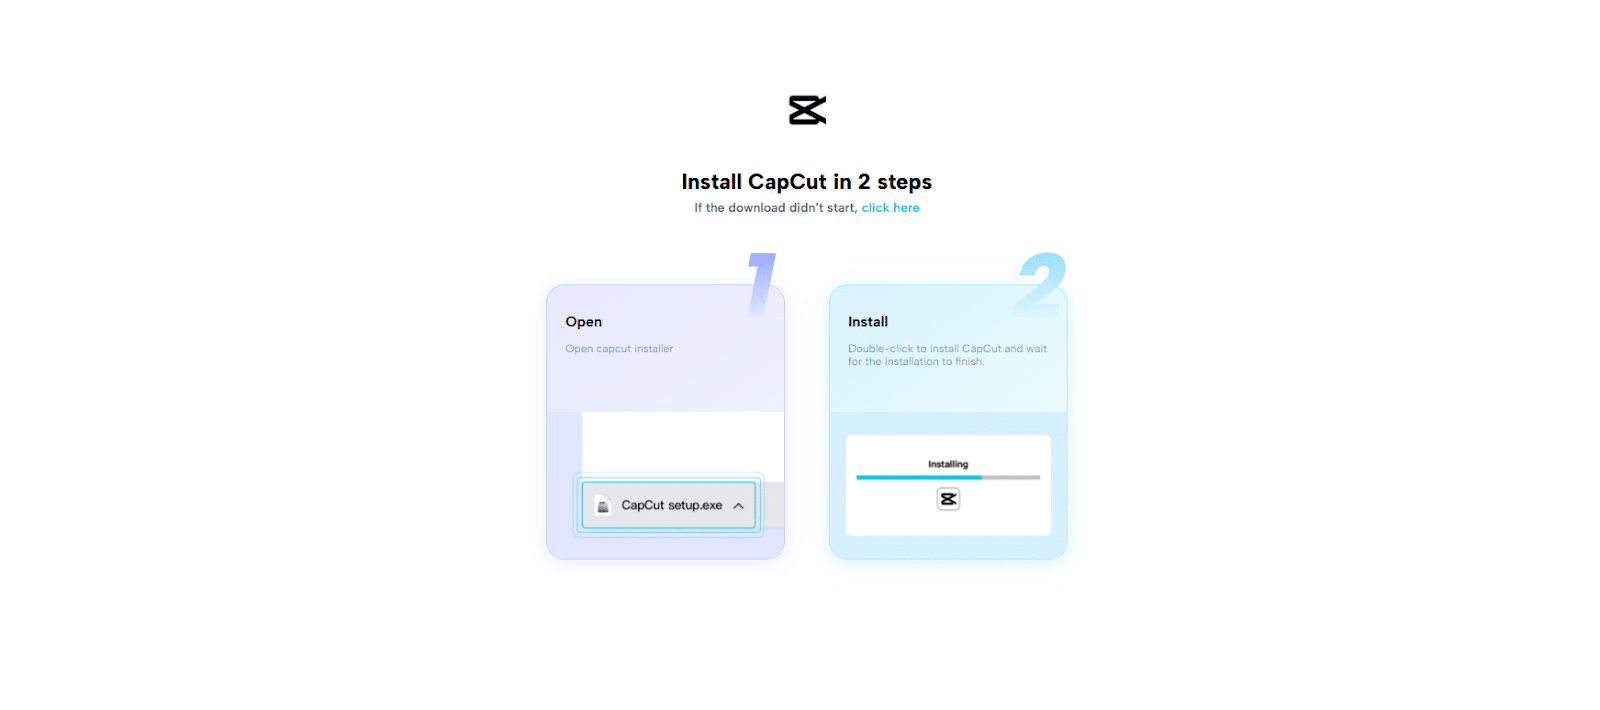
Step 1: Install CapCut Desktop Video Editor
Install CapCut Desktop Video Editor on its website. Install it on either Windows or macOS by following the instructions. Ensure your PC is of the required minimum in order to run the program smoothly. There are paid features of AI Storyboard. Having installed it, you can start up your script-to-video process.
Step 2: AI Storyboard Workspace
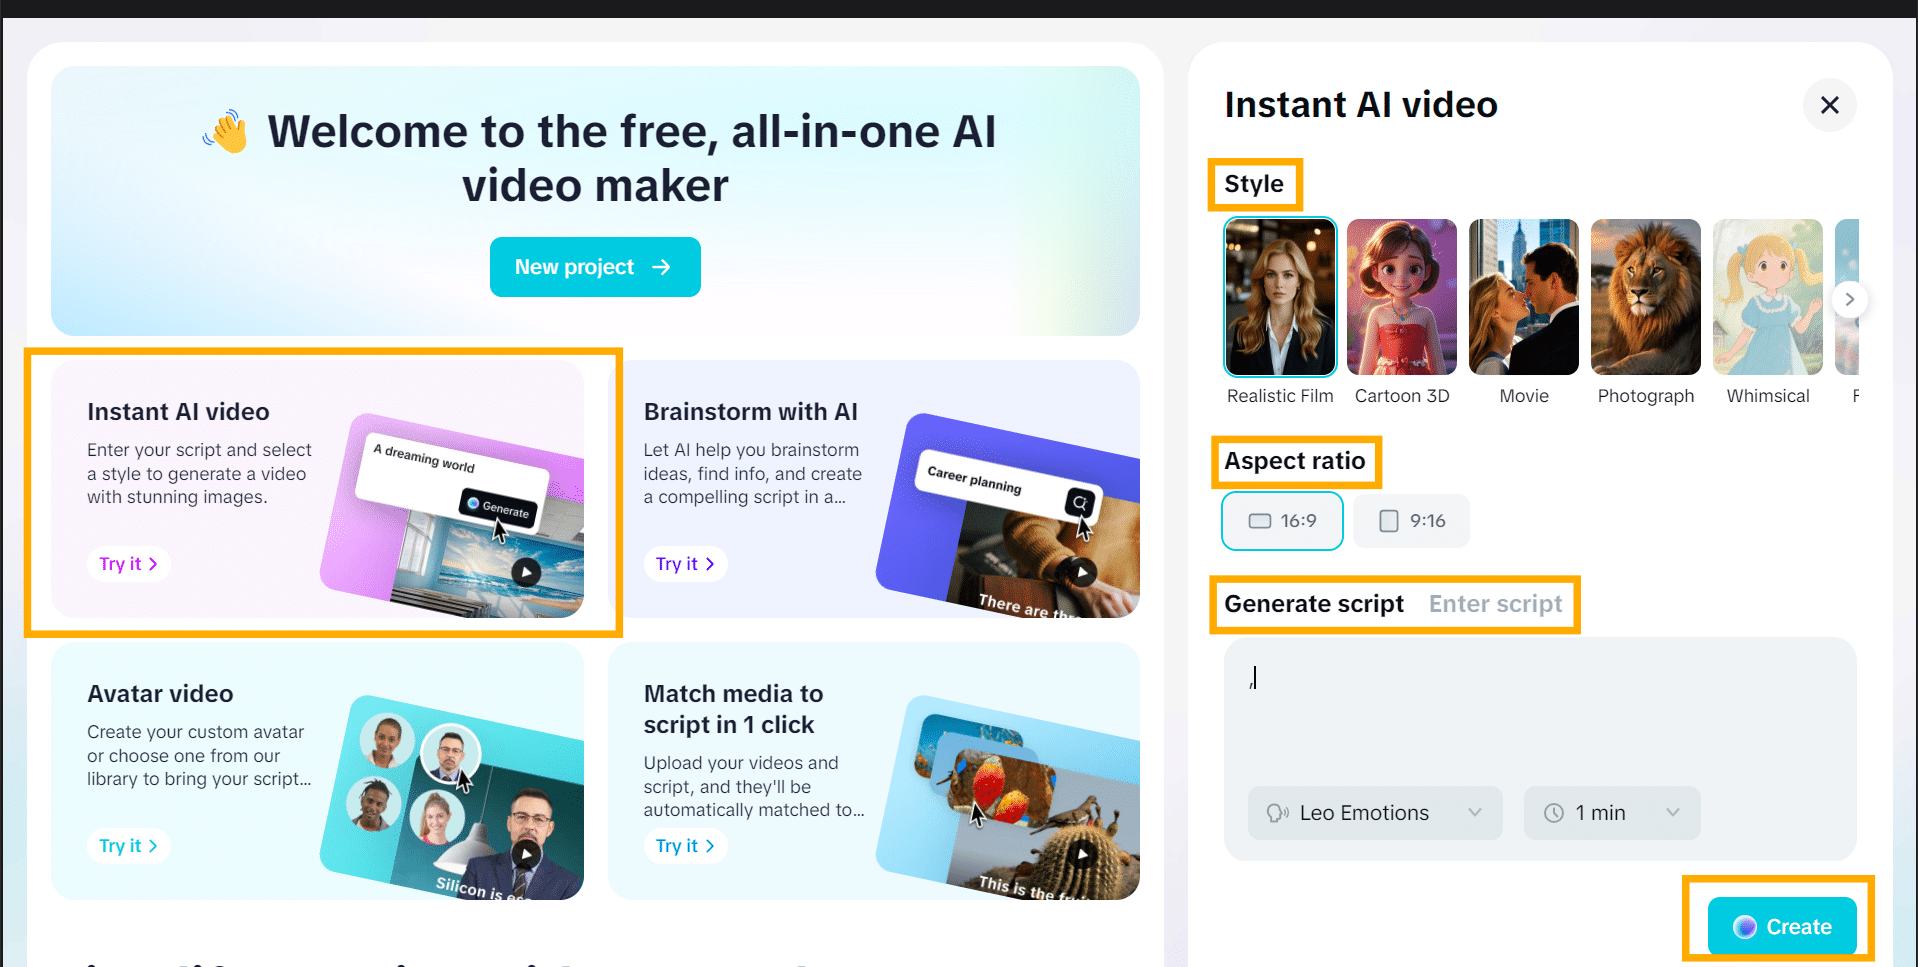
Select Launch CapCut Desktop Video Editor and select AI Video Maker on the main interface. This will create the editor where you are going to transform your script into visual parts. You have the option of Instant AI Video, or you can adjust the scenes manually.
Style and aspect ratio settings are contained in the right panel. Choose the appearance and the size to suit your project. This arrangement allows you to have a layout of how every part of your script will be displayed in visual form.
Step 3: Visual Section customization
Modify every scene with AI Storyboard. Each section allows you to choose styles, layouts and backgrounds. Inserting pictures, video recordings or effects will make every section appealing to the eye. Change the length of every scene to suit your script.
Use voice over and play headphones to sample the narration. Ensure that what is written is synchronized to the script and the story is easy to follow. Such little cuts will make the video appear professional and maintain the interest of your audience.
Step 4: Optional Editing or Export Video
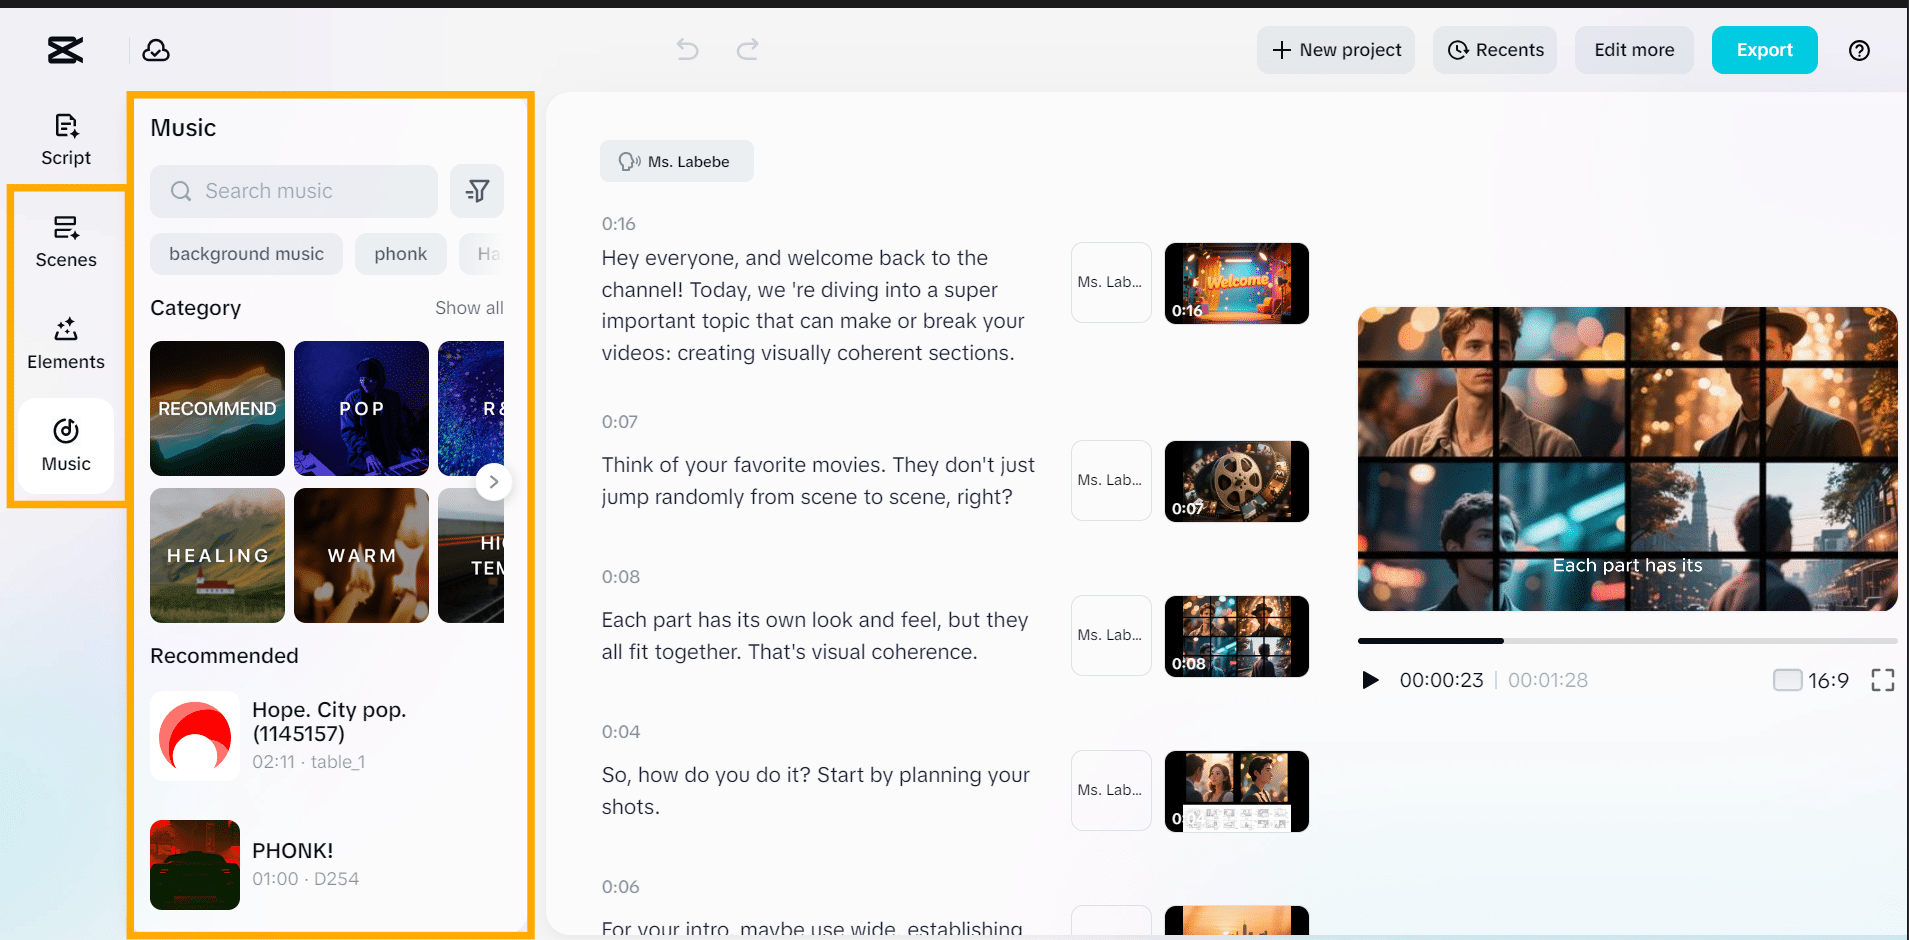
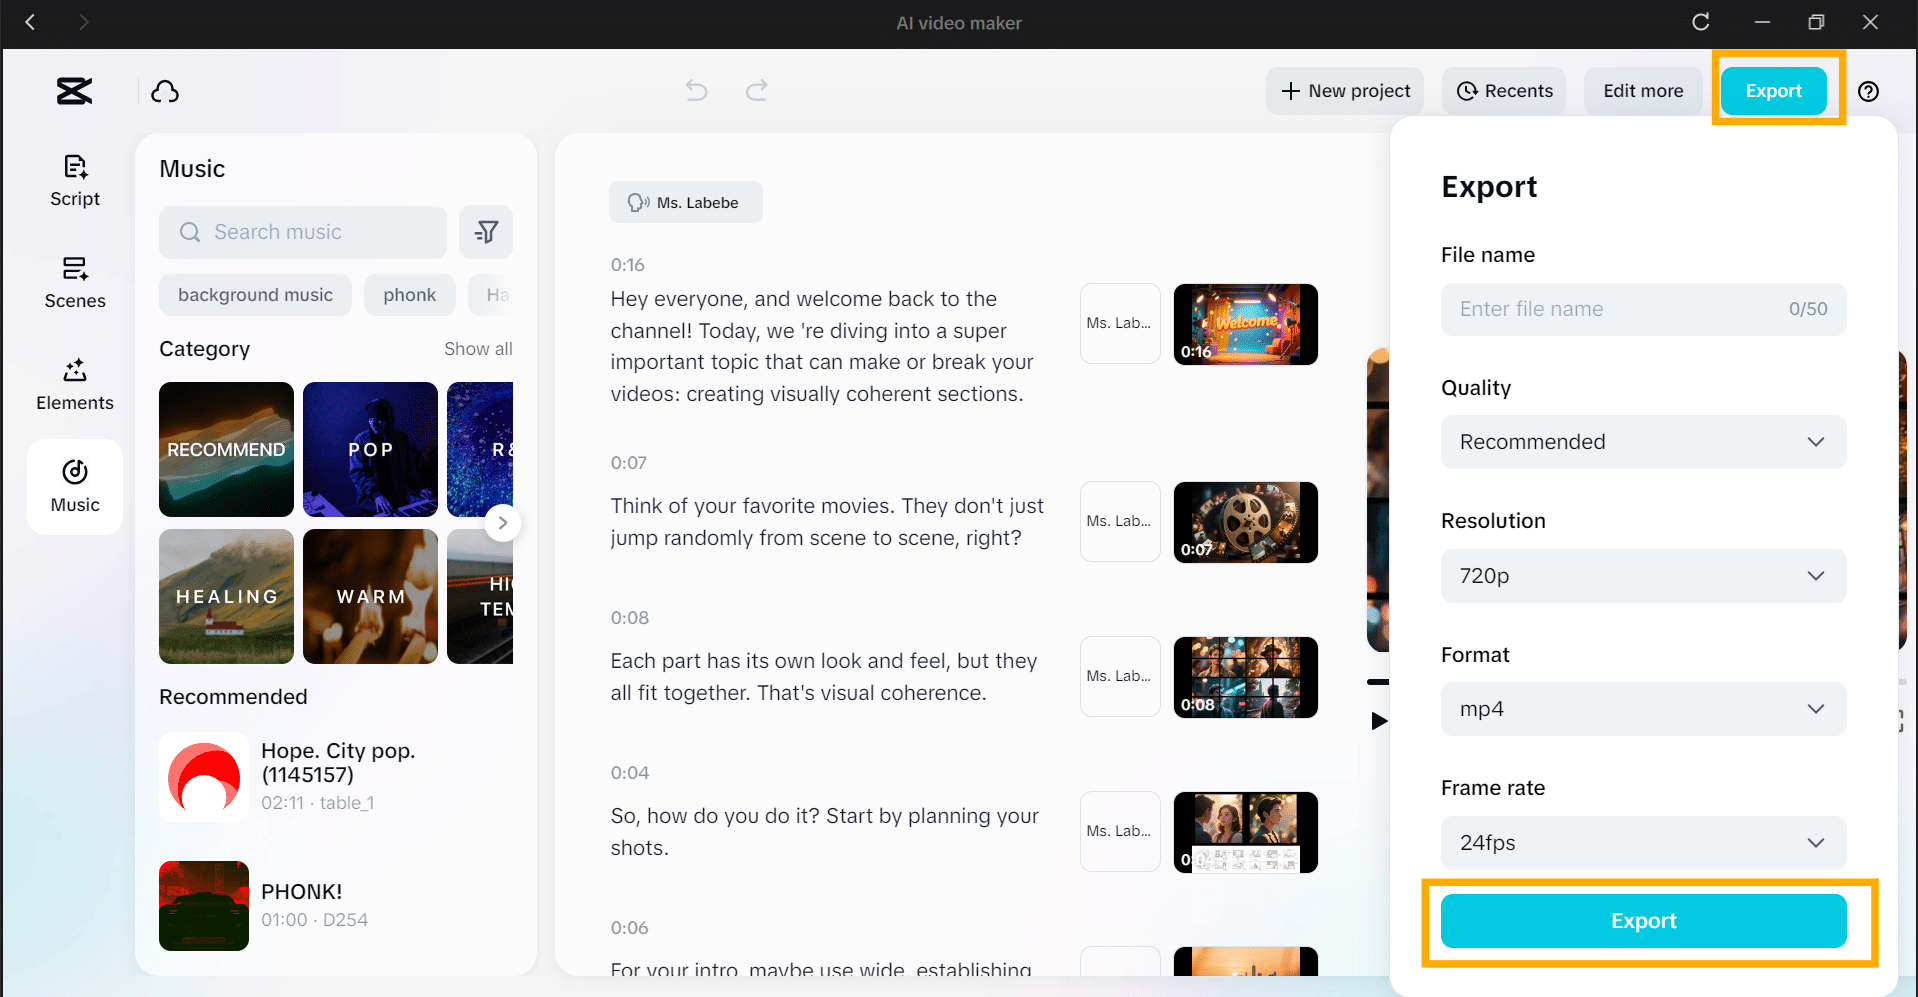
Elements can be added to the left panel as captions, stickers, or keywords. The music panel allows you to select music or sound effects.
After being satisfied, you can export, configure the file name, and resolution (up to 4K) and save. To have more control, you can choose Edit More to have access to the advanced tools of CapCut Desktop Video Editor.
Conclusion
Storyboarding CapCut Desktop Video Editor with the assistance of AI Storyboard allows converting scripts into videos quickly and easily. The tool is time-saving and maintains every scene in a clear and organized way. All the effects, voiceovers, music, and images are available in the same place.
Note that the features of CapCut PC are free, although the more sophisticated tools need to be paid for. Using AI Storyboard, you will have a professional appearance in your videos without wasting hours on it.
Begin a new work now by downloading CapCut Desktop Video Editor, uploading your script, and seeing AI Storyboard transform it into explicit interesting sections.
Observer Voice is the one stop site for National, International news, Sports, Editor’s Choice, Art/culture contents, Quotes and much more. We also cover historical contents. Historical contents includes World History, Indian History, and what happened today. The website also covers Entertainment across the India and World.

