
Documenting School Events with CapCut PC’s Stabilization Tool
Capturing school events on video is a great method of preserving memories and also allowing other people to share them.
Videos allow for such important moments like plays, sports, and ceremonies to be easily captured. However, shaky videos are hard to watch and enjoy memories.
When videos are shaky, the audience may lose interest or miss out on key parts. That is where CapCut PC’s Stabilization Tool helps. It stabilizes shaky footage and makes videos look smooth.
With this feature included in your tool, your school event videos are more pleasant and professional, enabling individuals to relive the moments without distraction.
What is CapCut PC’s Stabilization Tool?
CapCut PC is a downloadable desktop video editor from its official website. It contains some tools to make your videos better, including a stabilization tool.
This feature does this by reducing the shakiness of your video, hence the video becomes smoother and easier to watch. While CapCut PC itself is free, some of the other higher-level functions are not free.
The stabilization tool is available for free, though. The use of this tool helps make your school event videos professional and concise.
In addition to stabilization, CapCut PC also includes some handy tools like text to speech, through which you can add voice narration to your videos. This will enrich your school event videos by narrating what is being done or adding good comments.
Why Use CapCut PC’s Stabilization Tool for School Events?
While recording school events, the video tends to jitter because of hand movement or noise from the crowd. This prevents people from watching the video.
Using the stabilization tool in CapCut PC fixes the problem by stabilizing the video. This enables parents, students, and teachers to watch the video without disruption.
Stabilized videos also highlight important parts, like speeches and performances. Using this tool is time-saving as you do not need to record again or take hours to correct the video manually.
CapCut PC supports many formats of video and will even let you export your videos at full quality, even 4K. It also comes with some features, including an AI video generator that can help you create more content or add creative effects to your school event videos.
Step-by-Step Guide to Using CapCut PC’s Stabilization Tool
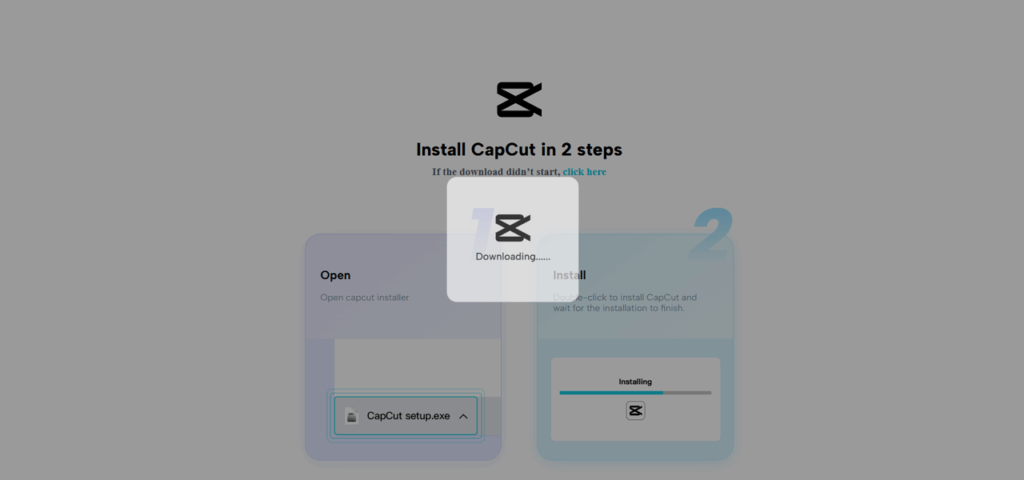
Step 1: Download and Install CapCut Desktop Video Editor
Go to the official CapCut PC website to download the desktop video editor. Download the setup file and open it to start installing.
Follow the instructions on the screen to finish the process. Don’t forget, some features require payment, but the stabilization tool is free to access.
Step 2: Import Your School Event Video
Open the CapCut PC desktop video editor. Click “Create project” to start. Now, click the “Import” button or drag your shaky school event video into the editor window. Your video will show up on the timeline at the bottom of the screen.

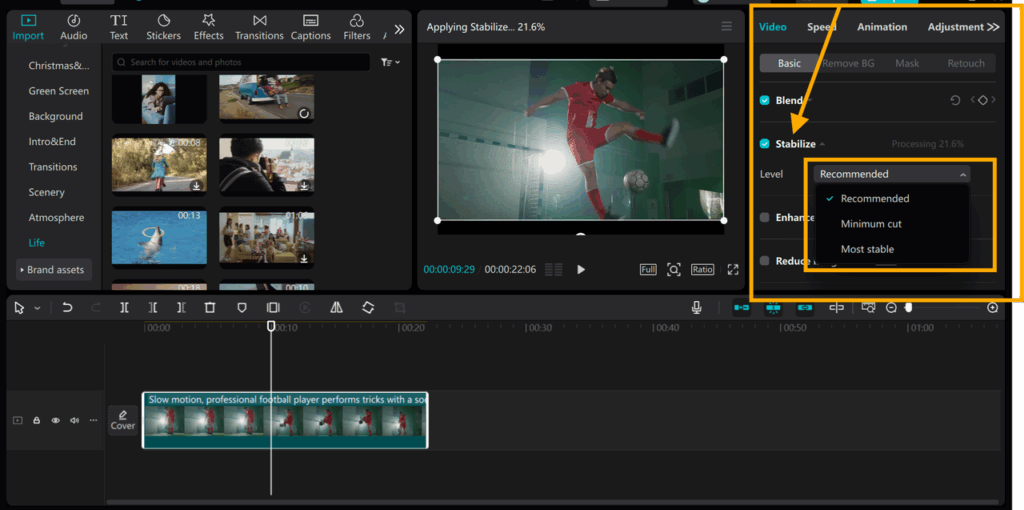
Step 3: Apply Video Stabilization
Click on the video clip in the timeline to indicate. To the right panel, click on the “Video” tab. Scroll down to the “Basic” settings section. Find the “Stabilize” option and check the box next to it. Three levels: “Recommended,” “Minimum Cut,” and “Most Stable” will be displayed.
- “Recommended” is a balance between smoothness and cropping.
- “Minimum Cut” keeps most of the video, but less smooth.
- “Most Stable” offers the smoothest video but crops a bit more.
Choose as per your needs. Allow CapCut PC a few seconds to process the video. Then, play the video to check the stabilization results.
Step 4: Some More Tips on Editing
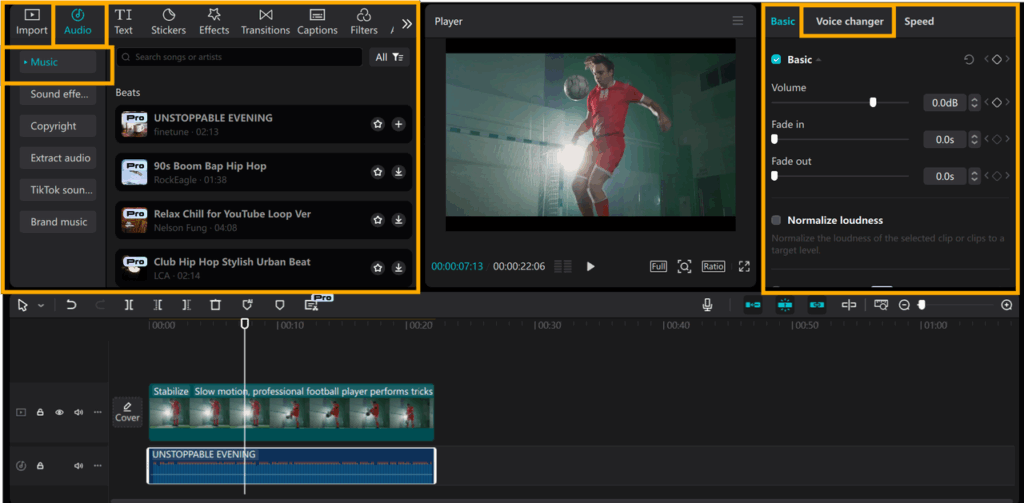
Trim your video or overlay text and subtitles to mark out special moments. You can use transitions to smooth the video.
You could even experiment with the voice changer option to alter the audio and make the video more entertaining or easier to watch for your audience.
Don’t forget to add background music to enhance the mood and tie everything together.
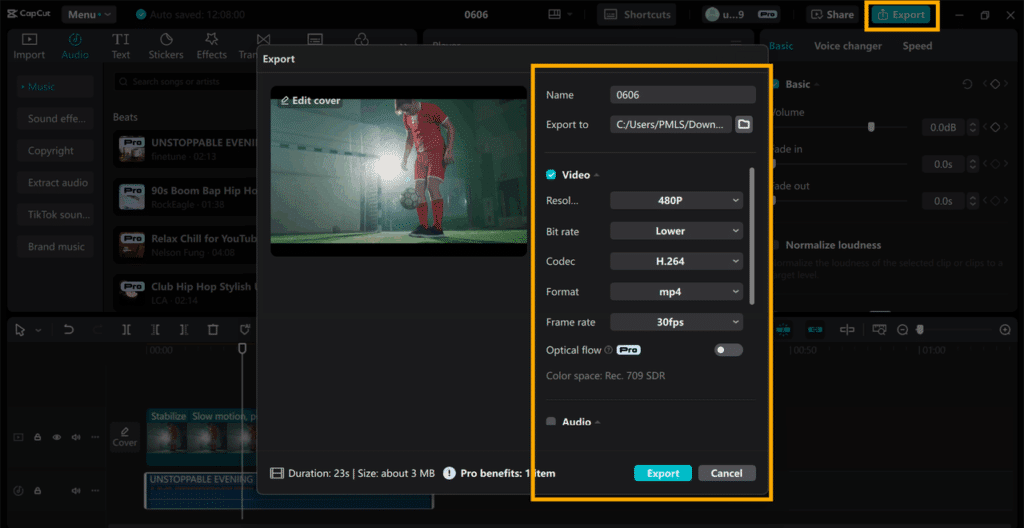
Step 5: Export and Share Your Video
Tap the “Export” button located in the top right corner. Choose your video resolution (up to 4K), format, and frame rate. Tap “Export” once more to save the video to your computer.
Now you can easily share your school event video on social media, school sites, or by email. Make sure to preview the final video before sharing to catch any last-minute errors.
Conclusion
Stabilizing your school event videos makes them look clear and professional. With the stabilization tool of CapCut PC, it is easy to stabilize shaky videos quickly and maintain audience engagement.
Although CapCut PC has numerous free tools, certain tools require payment. Nevertheless, the stabilization tool does offer no charges and is simple to access.
Use CapCut PC desktop video editor on your next school event to save memories with higher-quality videos.
This program will allow you to maintain those special moments running smoothly and with enjoyment for all viewers.
Observer Voice is the one stop site for National, International news, Sports, Editor’s Choice, Art/culture contents, Quotes and much more. We also cover historical contents. Historical contents includes World History, Indian History, and what happened today. The website also covers Entertainment across the India and World.